Sunday, February 19, 2012

It's been a while since the last post.  We've been busy starting the cabinet install, which has been much more difficult than we imagined because of A.) an old house with super wavy and slanted walls, B.) the design's a little complicated and C.) we've never done this before.  So all that added up equals time and a little frustration, but we'll have it done soon enough.

And here are some pictures:


Starting out with the corner cabinet...


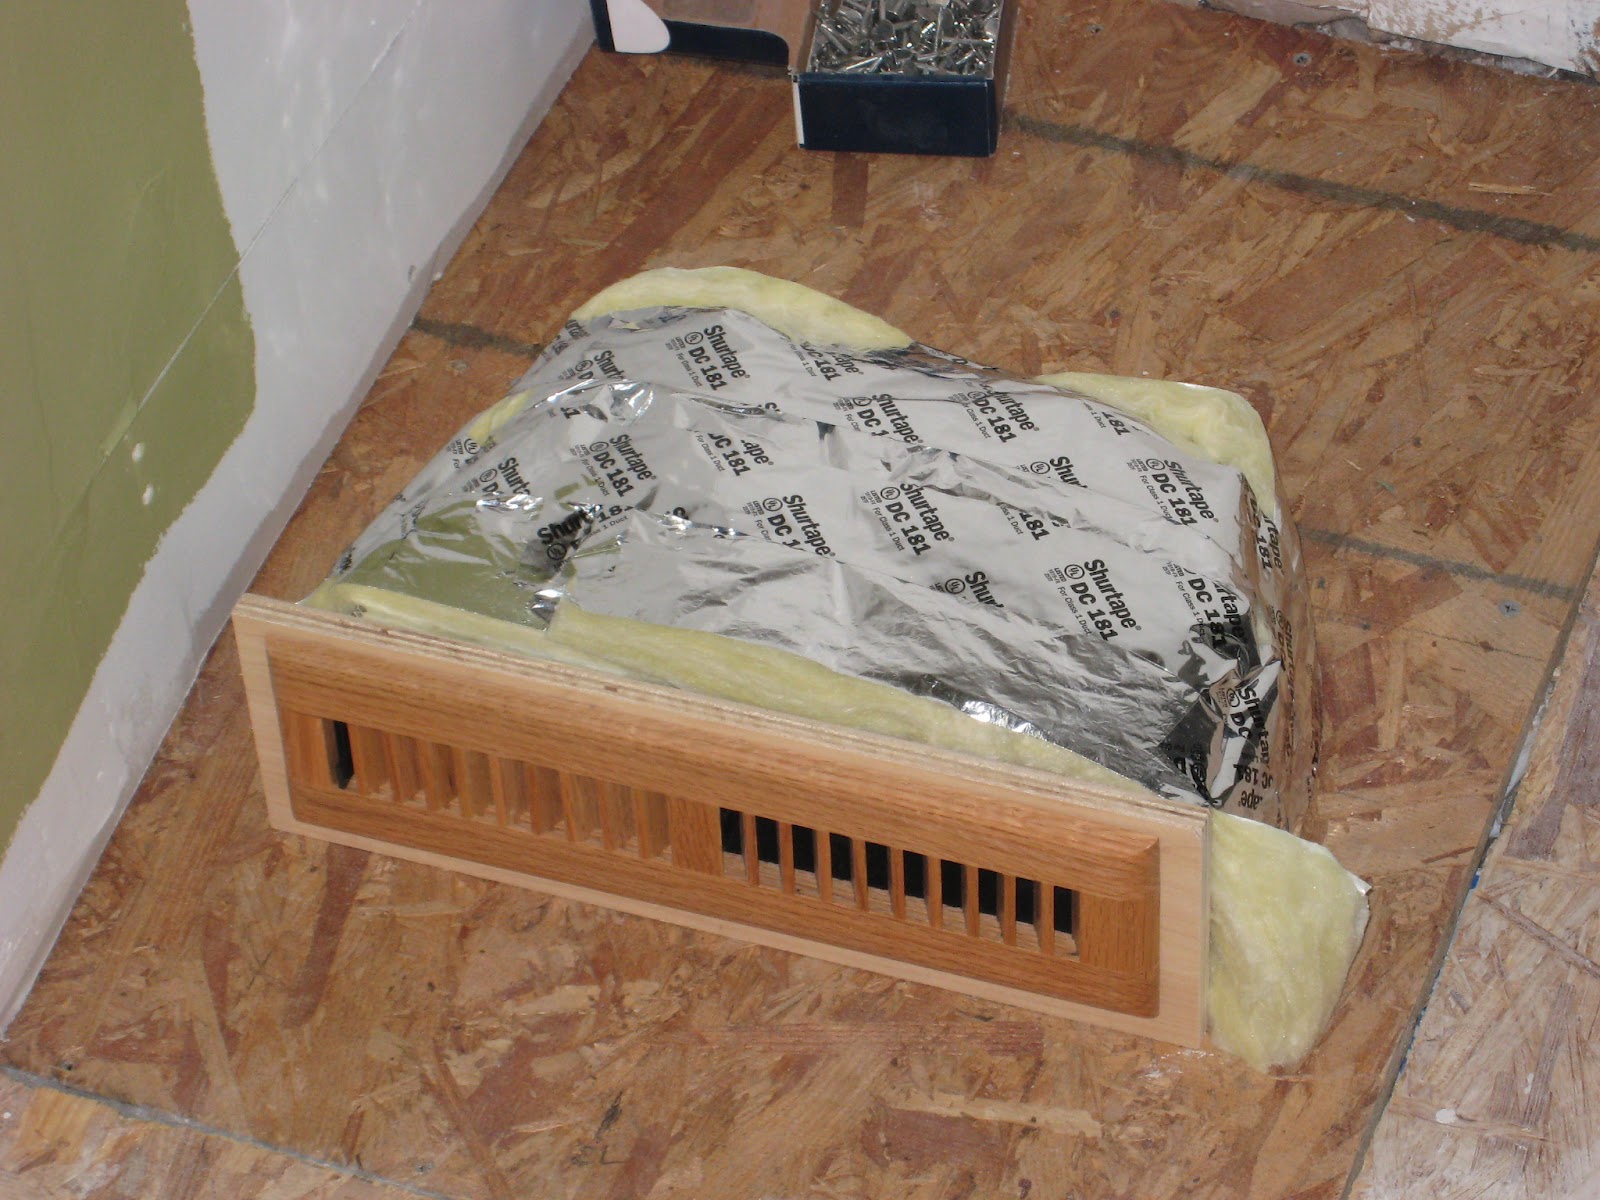
Here's the duct coming up under the full height cabinet.  The duct will turn and blow out under the toe kick.


We had to fabricate the base for the full height cabinet.  The duct from the picture above will fit in this cavity.


Before the cabinet goes in we have to glue on a white finish panel.


So far we have these four upper cabinets in.  The big filler panel is just a temporary thing for spacing.  Once the finished floor goes in we'll put in the permanent panel.


And a big surprise...it actually started to snow today!  We had about 3 inches when I took this and were expecting another 2-3 inches.


Our back alley never looked so nice...


...And our new tree had its first snow.


Wednesday, January 18, 2012

More Progress

The drywall is up and the first primer coats are down (many thanks to Sarah's parent's for helping out on the cost of the drywall install and to my dad for helping out with the priming).


Getting the beam ready for trim involved attaching some furring strips and cutting the bolts down at the connectors.  The new toy is in this picture too...a 12" Bosch compound miter saw.


Sarah spent the day cleaning the brick in the background.


Tuesday, January 3, 2012

'Rockin

Well we finally got around to hanging the sheet rock this past week (with a tremendous help from the contractor) so we're starting to see the space materialize.  It's a whole lot brighter down there too.  Sarah and I took the entire week off and in that span we...

- built the 45 degree wall in the kitchen
- finished installing the kitchen vent
- had some more electrical work done
- helped the contractor hang the drywall
- mudded and sanded the drywall
- finished the last couple pieces of the floor
- finished painting the stairwell
- painted the front porch decking
- had some painting done on the exterior
- took a mountain of things to the dump
- picked up a window to get installed downstairs
- demo'd half of the downstairs bathroom

Not bad for a week's work...here are some pictures:


Hanging drywall..........fun


Sarah tearing apart the downstairs bathroom


Getting ready for another fun outing to the dump...that's the old bathtub surround standing up.


Sarah's mom came down to help sand over the weekend.


Another view of the living room....it's getting there.

Monday, December 19, 2011

This weekend we put in the venting for the future microwave hood.  This involved knocking a huge hole in the wall and piecing together some ductwork.  We also started building the 45 degree wall in the corner which is turning out to be a little complicated.  More pictures on that when we finish...


Monday, December 12, 2011

Well, we finally have a floor!  After a long weekend we can walk around in our living room and kitchen without having to balance on the joists.  Next up is drywall and then we can paint!


This duct will turn up under a cabinet and blow out the front.  It's a bit complicated but should look nice when it's all done.


The backyard's starting to look a little scary again.  We might need to clean up before the neighbors get angry.


...and Sarah checking out the finished floor.

Friday, December 9, 2011

This project has been pretty much all consuming, eating our free time and occupying our weekends.  Now, it's not always a bad thing but every now and again we really would sure like to be done.  So anytime we can get some help we'll gladly take it, and last weekend we had some help from my mom and dad and Sarah's brother Tommy.


This should be the last time we see the kitchen without a floor.  You can see the angled shims we had to cut to level the joists.  The back of the kitchen had about an 1 1/2" dip slope towards the back.


And the kitchen with the floor fully insulated.


And here's my dad putting in a piece of subfloor.  He subscribes to the "measure twice, cut once" school of thought...I like the "measure quickly, cut sloppy, find it doesn't fit, get angry, measure again, cut it better, find it fits OK" school of thought.  We managed to get the hardest pieces in that weekend so I'd say it was productive.


My mom and Sarah spent the day scraping, sanding and priming the old solid doors.  These things are HEAVY and take a lot of work to restore.


Sarah's brother Tommy came by on Sunday to help with more subfloor.  We managed to put in the last complicated pieces so now all that's left are the big easy ones.

Very soon we should be able to start drywalling the living room and kitchen so it will finally start to look like a finished spaced.

Monday, November 14, 2011

Recently we've been wading through the muck of this project, and by muck I mean dealing with permits and coordinating work around the inspections process.  Certain things need to happen in a certain order...a framing inspection can only be done after a passing electrical and plumbing inspection....an insulation inspection can only be done after the framing inspection and before the walls and floor are closed up...and so on.  It's been very frustrating at times but finally the clogs have begun to loosen up a bit.

We've had in the last two weeks plumbing, electrical and framing inspections, put down about 1/3 of the subfloor, had the majority of the electrical rough-in done, framed out an opening for the future stained glass and insulated the walls and ceiling.

We hope to get the subfloor finished in the next couple weeks and then we can move on to installing drywall.  And of course here are some pictures:


Here's the retaining wall the contractor fixed...this was damaged back in the earthquake a few months ago.


The new opening for a future stained glass window.  This should give the house more of a period feel.


Sarah having fun mudding around the doors and many of the holes we put in the walls.


This insulation is for acoustics between the upper and lower unit.  I can't take credit for doing all this though...many thanks to my sister Mary and brother Geoff for coming down to help on Saturday!


The kitchen is FINALLY starting to come together.  We were getting so tired of seeing the framing everyday so it's nice to see it being covered up.